Introduction
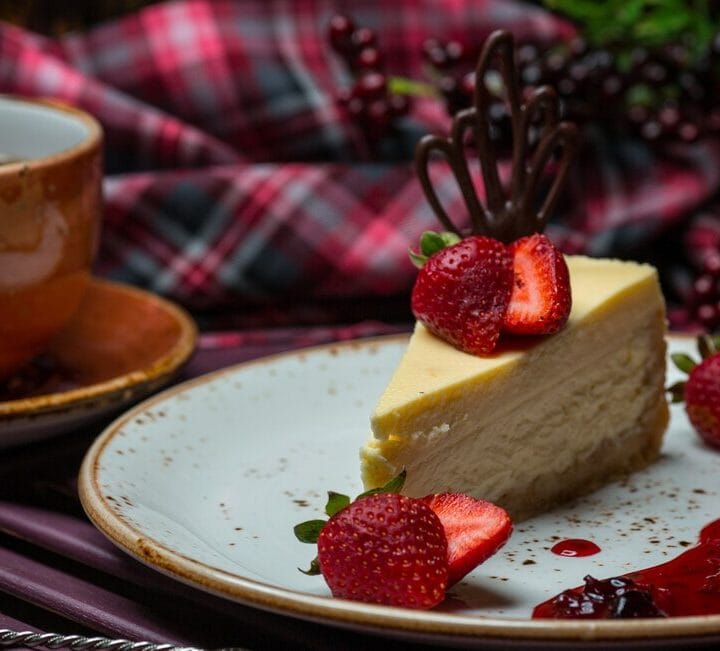
Few desserts can match the elegance and decadence of a classic strawberry cheesecake recipe. With its buttery graham cracker crust, velvety smooth cream cheese filling, and vibrant, glossy strawberry topping, this dessert is a true show-stopper. It’s not just a treat for the palate—it’s a visual masterpiece, perfect for any occasion, from festive parties to quiet family dinners or even as a midweek indulgence.
Baking a perfect cheesecake might seem daunting, but with the right techniques and attention to detail, you can achieve bakery-level results in your own kitchen. This comprehensive guide will walk you through every step, ensuring success whether you’re a novice or an experienced baker.
Understanding the nuances of baking cheesecakes is key to achieving perfection. For example, mastering the water bath technique not only prevents cracks but also ensures a silky, custard-like texture. Explore more about this method in this detailed cheesecake baking guide. Additionally, perfecting your strawberry glaze can elevate your cheesecake’s flavor and presentation. Learn how to create flawless fruit toppings with this comprehensive guide.
Let’s dive into the details and bring your dream strawberry cheesecake to life! 🍓
Ingredients for the Perfect Strawberry Cheesecake Recipe
For the Crust:
- 1 ½ cups graham cracker crumbs (or digestive biscuits for a British twist)
- ¼ cup granulated sugar
- 6 tablespoons melted butter
the Filling: Strawberry Cheesecake Recipe
- 24 ounces cream cheese, softened
- 1 cup granulated sugar
- 3 large eggs
- 1 teaspoon vanilla extract
- ½ cup sour cream or heavy cream
For the Strawberry Topping:
- 1 pound fresh strawberries, hulled and sliced
- ⅓ cup granulated sugar
- 2 tablespoons lemon juice
- 1 tablespoon cornstarch
Essential Equipment For Strawberry Cheesecake Recipe
Before diving into the recipe, gather these tools to ensure a smooth baking process:
- Springform pan
- Mixing bowls
- Electric mixer or stand mixer
- Spatula
- Saucepan
- Measuring cups and spoons
- Large baking dish for the water bath
For a unique twist, consider incorporating dates into your cheesecake crust or filling. Our Date Palm Recipe guide offers sweet and savory ideas that can inspire creative variations of your strawberry cheesecake.
Step-by-Step Preparation Guide
Preparing the Crust
- Preheat the oven: Set it to 325°F (163°C). A preheated oven ensures even baking.
- Combine ingredients: Mix graham cracker crumbs, sugar, and melted butter in a bowl until the texture resembles wet sand.
- Form the crust: Press the mixture firmly into the bottom of a greased springform pan. Use the back of a spoon or the bottom of a glass for an even layer.
- Bake and cool: Bake for 10 minutes, then set aside to cool completely. This step ensures a crisp, sturdy base for your cheesecake.
Making the Filling: Strawberry Cheesecake Recipe
- Soften the cream cheese: Allow it to reach room temperature for a smooth and lump-free filling.
- Beat the cream cheese and sugar: Use an electric mixer to beat until creamy. Avoid overmixing to prevent air bubbles.
- Incorporate eggs: Add eggs one at a time, mixing until just combined. This prevents overmixing and ensures a silky texture.
- Add the remaining ingredients: Stir in the vanilla extract and sour cream (or heavy cream) for added richness.
Assembling and Baking
- Pour the filling: Gently pour the filling over the cooled crust, spreading it evenly with a spatula.
- Prepare the water bath: Place the springform pan in a larger baking dish. Fill the outer dish with hot water until it reaches halfway up the sides of the pan.
- Bake: Place in the oven and bake for 60–70 minutes. The center should be slightly jiggly but set.
- Cool gradually: Turn off the oven and let the cheesecake cool inside for 1 hour to prevent cracks.
Cooling and Chilling: Strawberry Cheesecake Recipe
- Cool at room temperature: Remove the cheesecake from the oven and let it cool completely on the counter.
- Refrigerate: Cover the pan with plastic wrap and refrigerate for at least 4–6 hours, preferably overnight. Chilling allows the flavors to meld and the texture to firm up.

Preparing the Strawberry Topping
- Cook the strawberries: In a saucepan over medium heat, combine strawberries, sugar, and lemon juice. Cook for 5–7 minutes until the strawberries release their juices.
- Thicken the sauce: Dissolve cornstarch in 2 tablespoons of water and stir it into the strawberry mixture. Cook for another 2–3 minutes until thickened.
- Cool the topping: Remove from heat and let the mixture cool to room temperature.
Adding the Topping and Serving
- Spread the topping: Once the cheesecake has chilled, remove it from the springform pan and place it on a serving platter. Spread the cooled strawberry topping evenly over the surface.
- Garnish and slice: Add fresh strawberry slices or mint leaves for decoration. Slice with a clean, sharp knife for neat servings.
- Serve chilled: Cheesecake tastes best when cold. Pair it with whipped cream or a drizzle of chocolate for an extra treat.
Pro Tips for Success: Strawberry Cheesecake Recipe
Creating the perfect strawberry cheesecake requires attention to detail and some tried-and-true techniques. Follow these tips to ensure your cheesecake turns out flawless every time.
1. Room Temperature Ingredients
Using room-temperature dairy ingredients, such as cream cheese, eggs, and sour cream, is essential for achieving a smooth and lump-free filling. Cold ingredients don’t mix as well and can result in a lumpy batter, affecting the texture of your cheesecake. Allow these ingredients to sit out for about 30–60 minutes before mixing to reach optimal temperature.
2. Water Bath
A water bath is a must for professional-quality cheesecake. This method helps maintain consistent moisture and temperature during baking, preventing the cheesecake from cracking or drying out. Here’s how to do it:
- Wrap the bottom of your springform pan in aluminum foil to prevent leaks.
- Place the pan in a larger baking dish and fill it with hot water halfway up the sides.
- The steam from the water bath ensures the cheesecake bakes evenly and retains a silky, custard-like texture.
3. Patience is Key: Strawberry Cheesecake Recipe
Cheesecake is not a dessert to rush. After baking, let the cheesecake cool gradually in the oven for an hour, then transfer it to the countertop until it reaches room temperature. Finally, refrigerate for at least 6 hours or, ideally, overnight. This process allows the flavors to develop and the texture to set properly, resulting in a rich, creamy cheesecake.
Planning a full-course meal? Pair your strawberry cheesecake with a hearty main dish. Explore our Baked Beans Recipe: The Ultimate Guide for a savory complement to your dessert.
Variations to Try Of Strawberry Cheesecake Recipe
Cheesecake is incredibly versatile, and these variations will add excitement to your baking repertoire:
1. No-Bake Strawberry Cheesecake
For an easier, no-bake version, combine cream cheese, whipped cream, and gelatin. Set the mixture over a graham cracker crust and chill until firm. This option is perfect for summer days when you want to avoid using the oven.
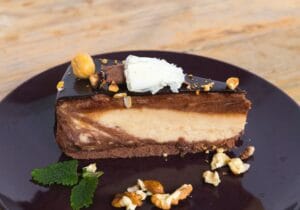
2. Chocolate Strawberry Cheesecake
Elevate your cheesecake with a layer of melted chocolate. Simply mix melted dark chocolate into the cream cheese filling for a rich, decadent twist. Top with chocolate-dipped strawberries for added indulgence.
3. Vegan Version
Replace cream cheese with plant-based alternatives like cashew cream or vegan cream cheese. Use coconut cream instead of sour cream or heavy cream. This vegan variation maintains the creamy texture without any dairy.
4. Gluten-Free Option: Strawberry Cheesecake Recipe
Substitute graham cracker crumbs with gluten-free cookie crumbs or almond flour. This swap creates a delicious crust suitable for those with gluten sensitivities.
Serving Suggestions
The right accompaniments can enhance your strawberry cheesecake experience. Here’s how to serve it like a pro:
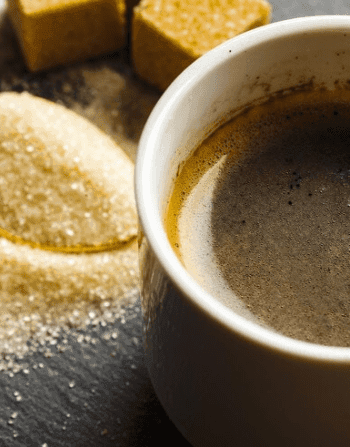
- Pair it with a beverage: Enjoy your cheesecake with a cup of hot coffee, tea, or a sweet dessert wine for a sophisticated finish.
- Add a topping: A dollop of whipped cream, a scoop of vanilla ice cream, or a drizzle of caramel or chocolate syrup can elevate the indulgence factor.
- Garnish creatively: Decorate your cheesecake with mint leaves, extra strawberry slices, or a dusting of powdered sugar for a fresh and elegant presentation.
Storage and Shelf Life: Strawberry Cheesecake Recipe
Proper storage is key to maintaining the flavor, texture, and overall quality of your cheesecake, whether you plan to enjoy it over a few days or save it for a special occasion. Here’s how to ensure your cheesecake stays fresh and delicious:
Refrigeration: Strawberry Cheesecake Recipe
- To preserve your cheesecake for up to 5 days, store it in an airtight container or wrap it tightly in plastic wrap. This prevents the cake from drying out and protects it from absorbing odors from other foods in the refrigerator.
- If you’ve added a fruit topping, ensure it’s fully set before wrapping to avoid smudging or leaking.
- For best results, place the cheesecake on a flat surface in the refrigerator to maintain its shape and presentation.
Freezing: Strawberry Cheesecake Recipe
- For longer storage, cheesecake freezes beautifully when prepared correctly. Slice the cheesecake into individual servings for convenience.
- Wrap each slice tightly in plastic wrap to lock in moisture and flavor, then wrap again in aluminum foil to provide an extra barrier against freezer burn.
- Place the wrapped slices in a freezer-safe bag or container, removing as much air as possible to maintain freshness.
- Cheesecake can be frozen for up to 3 months without compromising its taste or texture.
- To serve, thaw the slices overnight in the refrigerator. Avoid thawing at room temperature, as this can cause condensation and sogginess.
Pro Tip for Optimal Freshness
- If you’re freezing a cheesecake with a fresh fruit topping, consider adding the topping after thawing to preserve its vibrant color and texture.
- Label your wrapped slices with the date of freezing to track storage time and ensure the best quality.
By following these storage tips, you can enjoy your strawberry cheesecake at its peak, whether it’s freshly made or saved for a later indulgence.
Common Mistakes to Avoid
Avoid these common pitfalls to ensure your cheesecake is perfect every time:
1. Overmixing the Filling
Overmixing the batter incorporates excess air, which can cause the cheesecake to rise and fall during baking, leading to unsightly cracks. Mix the ingredients just until combined, especially after adding the eggs.
2. Skipping the Water Bath
A water bath is essential for even baking and maintaining a creamy texture. Without it, the edges of the cheesecake can dry out or overcook, while the center remains underdone.
3. Impatient Chilling
Rushing the cooling and chilling process can compromise the cheesecake’s texture. Always allow enough time for the cheesecake to cool gradually and set properly in the refrigerator.
4. Using Low-Quality Ingredients
The quality of your cheesecake depends on the ingredients you use. Opt for full-fat, high-quality cream cheese for the richest flavor and texture. Similarly, use fresh, ripe strawberries for the topping to enhance the dessert’s taste and visual appeal.
Frequently Asked Questions
How long is strawberry cheesecake good for?
Strawberry cheesecake can last up to 5 days when stored in an airtight container in the refrigerator. To maximize freshness, ensure the cheesecake is covered tightly to prevent it from absorbing odors. For longer storage, you can freeze the cheesecake, where it will remain good for up to 3 months. Thaw frozen cheesecake in the refrigerator overnight for the best texture and flavor.
Will cheesecake harden?
Yes, cheesecake will harden as it cools and sets in the refrigerator. After baking, allow the cheesecake to cool at room temperature before chilling it for at least 4–6 hours or preferably overnight. This ensures the cheesecake achieves the ideal creamy texture while remaining firm enough to slice perfectly.
How long will homemade cheesecake last?
Homemade cheesecake will stay fresh in the refrigerator for 4–5 days if stored properly in an airtight container. If you want to preserve it longer, freezing is a great option. Wrap the cheesecake tightly in plastic wrap and foil before freezing for up to 3 months. Thaw in the fridge when ready to serve.
What happens when you over mix cheesecake?
Overmixing cheesecake batter incorporates too much air, which can cause the cheesecake to rise and fall during baking, resulting in unsightly cracks on the surface. To avoid this, mix the ingredients just until combined, especially after adding eggs. A gently mixed batter ensures a smooth, creamy cheesecake texture without structural issues.

Conclusion
Making a strawberry cheesecake at home is not just about preparing a dessert—it’s about crafting a masterpiece that reflects your baking skills, attention to detail, and creativity. The process, from pressing the buttery crust to achieving the perfect creamy filling and topping it with vibrant, glossy strawberries, is as rewarding as the first delectable bite.
By following this step-by-step guide, you’re not only ensuring a cheesecake that tastes incredible but also one that looks as stunning as any bakery creation. Every element, from the crisp crust to the velvety filling and the luscious strawberry topping, combines to create a symphony of flavors and textures that will wow your family, friends, and guests.
So why wait? Gather your ingredients, roll up your sleeves, and bring this decadent dessert to life. Whether you stick to the classic recipe or explore variations like no-bake or chocolate-infused versions, the result will always be a crowd-pleaser. Share your creations with loved ones, experiment with your own twists, and enjoy the joy of baking a dessert that’s both beautiful and delicious.
Happy baking—and may your strawberry cheesecake steal the spotlight at every gathering! 🍓🎂