Introduction
For those who follow a gluten-free diet, finding quality gluten free bread can be a game changer. Whether you have celiac disease, non-celiac gluten sensitivity, or simply want to explore the benefits of gluten-free alternatives, this guide will walk you through everything you need to know about gluten free bread. From its health benefits to baking tips and recommended recipes, we’ve got you covered.
Discover this easy italian bread recipe to get started with a simple yet satisfying homemade option.
Understanding Gluten Free Bread
What is Gluten Free Bread?
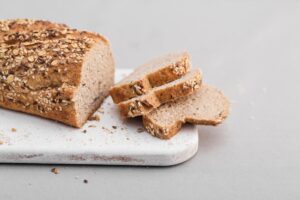
Gluten free bread is specially crafted to exclude gluten—a protein found in wheat, barley, and rye. It relies on alternative ingredients like rice flour and almond flour to achieve a similar texture to traditional bread. While making it gluten-free can be challenging, advancements in recipes and techniques make it easier to replicate the taste and feel of conventional bread.
For additional guidance, check out our Guide to Baking Bread Without Yeast, which provides valuable tips for alternative making methods.
Who Benefits From Gluten Free Bread?
This is particularly beneficial for those who:
- Have celiac disease, an autoimmune condition triggered by gluten.
- Suffer from non-celiac gluten sensitivity.
- Experience wheat allergies that make traditional bread consumption problematic.
- Follow a gluten-free diet for personal health or lifestyle reasons.
Types of Gluten Free Bread
Store-Bought
Many brands now offer ready-made gluten free bread for convenience. These products vary in taste, texture, and nutritional content. Some of the most popular brands include Udi’s, Schar, and Canyon Bakehouse. However, always check ingredient labels to avoid excessive sugars and preservatives.
When purchasing store-bought bread, consider factors like:
- Shelf Life: Many gluten free breads require refrigeration.
- Allergen Cross-Contamination: Ensure the bread is certified gluten-free.
- Added Nutrients: Look for options enriched with vitamins and minerals.
If you want to learn how to pair your bread with healthy soups, visit our article on The Best Campbell Soup to mix with this bread.
Homemade
Making it at home ensures greater control over ingredients and flavor. Some benefits of homemade bread include:
- Customizable recipes
- Avoiding preservatives
- Adjusting flavors to suit personal preferences
Popular homemade recipes include:
- Classic Gluten-Free Sandwich Bread: Soft and versatile.
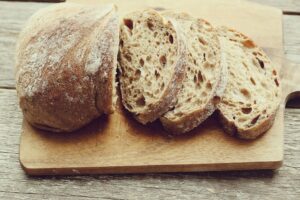
- Artisan Gluten-Free Loaf: Crusty with a chewy interior.
- Sweet Gluten Free Bread: Perfect for desserts or breakfast.
Explore buttery gluten free bread recipes for a rich and satisfying homemade option.
Key Ingredients and Steps for Making Gluten Free Bread
Creating delicious and fluffy bread requires a combination of specific ingredients and the right techniques. Here’s a simple guide to understanding the key components and how to use them effectively.
1. Gluten-Free Flours
Gluten-free flours serve as the foundation of your bread. Each type brings unique properties to the table:
- Rice Flour: A versatile and mild-tasting base, perfect for a soft texture.
- Almond Flour: Adds nuttiness, richness, and protein.
- Coconut Flour: Highly absorbent, so use it sparingly in combination with other flours.
- Sorghum Flour: A whole-grain option with a mild flavor and added nutrition.
- Teff Flour: Known for its earthy flavor and nutritional value, ideal for hearty bread.
How to Use:
Combine two or three types of flours for the best texture and flavor. For example, use a mix of rice flour, almond flour, and tapioca starch for a balanced loaf.
2. Binders and Leavening Agents
Since gluten provides structure in traditional bread, these substitutes are essential in gluten-free recipes:
- Xanthan Gum: Creates elasticity and holds the bread together.
- Psyllium Husk: Adds fiber and mimics gluten’s binding properties.
- Guar Gum: Works well with xanthan gum to stabilize the dough.
- Yeast: Adds airiness and helps the bread rise.
- Baking Powder: Useful for quick bread recipes that don’t use yeast.
How to Use:
Add 1 teaspoon of xanthan gum or psyllium husk per cup of flour. Proof yeast with warm water and sugar for 5-10 minutes before adding it to the dough for optimal rise.
3. Liquids and Additives
Moisture is critical in gluten-free baking to prevent dryness and crumbling. Common options include:
- Eggs: Provide structure and moisture.
- Milk or Plant-Based Alternatives: Almond milk or oat milk enhance flavor and texture.
- Sweeteners: Honey or agave syrup can improve flavor and help with browning.
How to Use:
Gradually add liquids to the dry ingredients, mixing until the dough is moist but not overly sticky. Adjust as needed to achieve the right consistency.
4. Innovative Ingredients
Modern gluten-free recipes often use creative ingredients to enhance texture and taste:
- Aquafaba: A vegan egg substitute made from chickpea water.
- Tapioca Starch: Adds chewiness and stretchiness.
- Potato Flour: Contributes softness and retains moisture.
How to Use:
Incorporate these ingredients in small amounts based on your recipe. For example, use 2 tablespoons of aquafaba to replace one egg.
Tips for Baking Gluten Free Bread
Baking this bread can be a challenging yet rewarding experience. By following these expert tips, you can ensure your bread turns out perfectly every time.
Measure Accurately
Precision is key when working with gluten-free recipes. Gluten-free flours and other ingredients behave differently than traditional wheat flour, so it’s essential to:
- Use a kitchen scale to measure ingredients accurately.
- Avoid estimating or eyeballing measurements, as slight variations can impact the final texture and taste.
Mix Thoroughly
Unlike traditional doughs, gluten-free dough requires thorough mixing to ensure even distribution of ingredients. Tips for better mixing:
- Use a stand mixer or hand mixer for consistent results.
- Mix until the dough has a uniform consistency but avoid overmixing, which can make the bread dense.
Let It Rest
Resting the dough is crucial for hydration and flavor development. During this time, the ingredients bind together more effectively. To optimize this step:
- Allow the dough to rest for at least 15-30 minutes before baking.
- Cover the dough with a damp cloth to prevent it from drying out during the rest period.
Use the Right Equipment
The tools you use can significantly impact the outcome of your bread. Recommended equipment includes:
- High-quality bread pans: These promote even heat distribution.
- Silicone spatulas: Ideal for handling sticky gluten-free dough.
- Oven thermometers: Ensure accurate oven temperature.
Experiment with Hydration
Gluten-free dough often requires more water than traditional doughs. Adjust hydration levels carefully to achieve the right consistency. Tips for managing hydration:
- Add liquids gradually to avoid overly wet or dry dough.
- Monitor the dough’s texture—it should be moist but not overly sticky.
Monitor Baking Time
Proper baking time ensures the bread is cooked evenly and thoroughly. To avoid underbaking or overbaking:
- Use a thermometer to check the bread’s internal temperature; it should reach 200°F (93°C).
- Avoid opening the oven door frequently, as this can cause uneven baking.
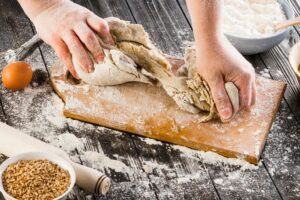
Shape the Dough
Handling gluten-free dough requires special care, as it is often sticky. Proper shaping techniques include:
- Wetting your hands with water or oil to prevent sticking while shaping the dough.
- Using a bench scraper for clean, precise cuts if dividing the dough.
Here are the Step-by-Step guide
| Step | Instructions |
|---|---|
| 1. Combine Dry Ingredients | Mix your chosen gluten-free flours with binders and leavening agents. |
| 2. Proof the Yeast | Dissolve yeast in warm water with a teaspoon of sugar. Let it sit until frothy. |
| 3. Mix the Dough | Gradually add liquids, eggs, and sweeteners. Mix thoroughly but avoid overmixing. |
| 4. Let It Rest | Allow the dough to rest for 15-30 minutes to improve hydration. |
| 5. Shape the Dough | Wet your hands to shape the sticky dough into a loaf or desired form. |
| 6. Bake | Place in a preheated oven at 375°F (190°C) until the internal temperature reaches 200°F (93°C). |
Health and Nutritional Benefits
While gluten free bread is a great option for those with dietary restrictions, it’s not inherently healthier than traditional bread. Many store-bought varieties are low in fiber and high in sugar. However, homemade bread allows for better nutritional control.
Enhancing Nutritional Value
To make your gluten free bread healthier:
- Incorporate Seeds: Chia, flax, and sunflower seeds add fiber and omega-3 fatty acids.
- Use Whole-Grain Flours: Teff, sorghum, and quinoa flours boost nutrients.
- Add Veggies: Zucchini or carrot puree can increase moisture and vitamins.
- Minimize Sugar: Opt for natural sweeteners like honey.
Comparing Gluten-Free and Traditional Bread
| Aspect | Gluten Free Bread | Traditional Bread |
|---|---|---|
| Protein Content | Lower (without fortified flours) | Higher (due to wheat gluten) |
| Fiber Content | Varies; often lower | Generally higher |
| Shelf Life | Shorter (requires freezing) | Longer |
Common Challenges in Gluten-Free Baking
Baking gluten free bread can be a rewarding experience, but it comes with unique challenges. Understanding and addressing these issues can help you achieve better results and make the perfect loaf every time.
Dense Bread
One of the most common problems in gluten-free baking is dense bread. This occurs when the bread lacks the airiness and structure found in traditional loaves. The primary reasons include:
- Insufficient Leavening Agents: Gluten-free recipes rely heavily on leavening agents like yeast, baking powder, or baking soda to create rise. Ensure you’re using the right amount for your recipe.
- Overmixing the Dough: Unlike traditional dough, gluten-free dough can become overly compact when mixed too vigorously. Mix just enough to combine ingredients.
- Using Outdated Yeast: Yeast loses its potency over time. Always check the expiration date and proof your yeast to ensure it’s active.
- Incorrect Hydration: Gluten-free dough often requires more liquid than wheat-based recipes. Insufficient hydration can result in a dense and heavy loaf.
Tips to Fix Dense Bread
- Add an extra teaspoon of xanthan gum or psyllium husk for elasticity.
- Let the dough rise in a warm, draft-free environment to maximize the yeast’s activity.
- Use a kitchen scale to measure ingredients accurately.
Crumbling Texture
Another frequent issue is crumbling, where the bread falls apart easily. This happens because gluten-free flours lack the natural binding properties of wheat flour. Causes of crumbling include:
- Insufficient Binders: Gluten-free recipes require binders like xanthan gum, guar gum, or psyllium husk to hold the bread together.
- Inadequate Hydration: A dry dough leads to a brittle texture. Ensure the dough is moist but not overly sticky.
- Improper Storage: It dries out faster than traditional bread if not stored correctly.
Tips to Prevent Crumbling
- Increase the amount of binder by 10-15% if your bread crumbles.
- Add eggs or egg substitutes like aquafaba to improve structure.
- Store the bread in an airtight container or freeze it for longer shelf life.
Uneven Baking
Uneven baking results in bread that is either undercooked in some areas or overcooked in others. Common reasons include:
- Incorrect Oven Temperature: An inaccurate oven thermostat can cause uneven cooking. Use an oven thermometer to verify the temperature.
- Unevenly Distributed Ingredients: Failing to mix ingredients thoroughly can result in inconsistencies in texture and rise.
- Improper Pan Selection: Using a dark or thin pan can cause uneven heat distribution.
Tips to Solve Uneven Baking
- Preheat your oven fully and use a reliable oven thermometer.
- Mix ingredients uniformly to avoid dense or raw spots.
- Opt for high-quality, heavy-duty bread pans designed for even heat distribution.
Frequently Asked Questions (FAQs)
What type of bread is gluten-free?
Conclusion
Whether you’re buying from a store or experimenting with homemade recipes, gluten free bread offers a delicious and versatile alternative to traditional bread. By using the right ingredients, techniques, and tools, you can create bread that meets your dietary needs without compromising on taste. Explore our related guides to expand your knowledge and enhance your gluten-free cooking journey.
With practice and the right resources, you’ll soon master the art of gluten-free baking, creating loaves that everyone will love. Each attempt brings you closer to the perfect loaf, tailored to your preferences and health needs.